30 Jul QUICKLY DRAWING UP PARTS IN ALEXSYS
QUICKLY DRAWING UP PARTS IN ALEXSYS

QUICKLY DRAWING UP PARTS IN ALEXSYS
Welcome to another MachMotion minute! In this article we will be talking about how to: Create a part in Alexsys, choosing a tool and posting Gcode to your MachMotion CNC Mill controller.
Overview
We will be walking through the basic CAD/CAM to a MachMotion CNC controller using Alexsys. We will setup stock material, create a clamp and send Gcode to MachMotion controller software to run the file.
About MachMotion
MachMotion provides industrial retrofits and controls. They also provide specialty solutions for application/processes that require unique control solutions. Additionally, MachMotion provides top of the line consultation and support. They are dedicated to their customers and deliver high-end products and services.
For more information or to speak to a specialist please visit MachMotion.
About Alexsys
Alexsys is a Conversational Assistant that is nice, fast and intuitive. Alexsys is now standard as a part of our 1000 Series mill controls. Alexsys provides classic conversational programming ease combined with the visual assistance of simple CAD. Stand right at the control and start creating parts!
With Alexsys™, Quickly draw up a part or just define an operation (drilling/pocket/face milling/etc…), simulate, and post code to run the part.
This conversational programming solution gives the ability to:
- 3D solid simulation
- Import shape from DXF/DWG
- Basic CAD editor
- Tool path simulation
- Tool library
- Machining time calculator
- 2D milling machining
- Face milling
- Contouring
- Pocketing
- Thread milling
- Engraving (single line font, true-type font, or selected geometry)
- Profile cutting
- Drilling
- Tapping
If you already have our mill control and are interested in getting Alexsys™, contact our team today to get started.
Machine Type Setup
First lets setup or machine settings so Alexsys knows what type machine we have.
Click the “Add Setup/Machine” on the left hand side under “Home”, this will allow you to choose from a dropdown “Milling” , now choose “Vertical Mill”.
Machine Origin and Safety Z
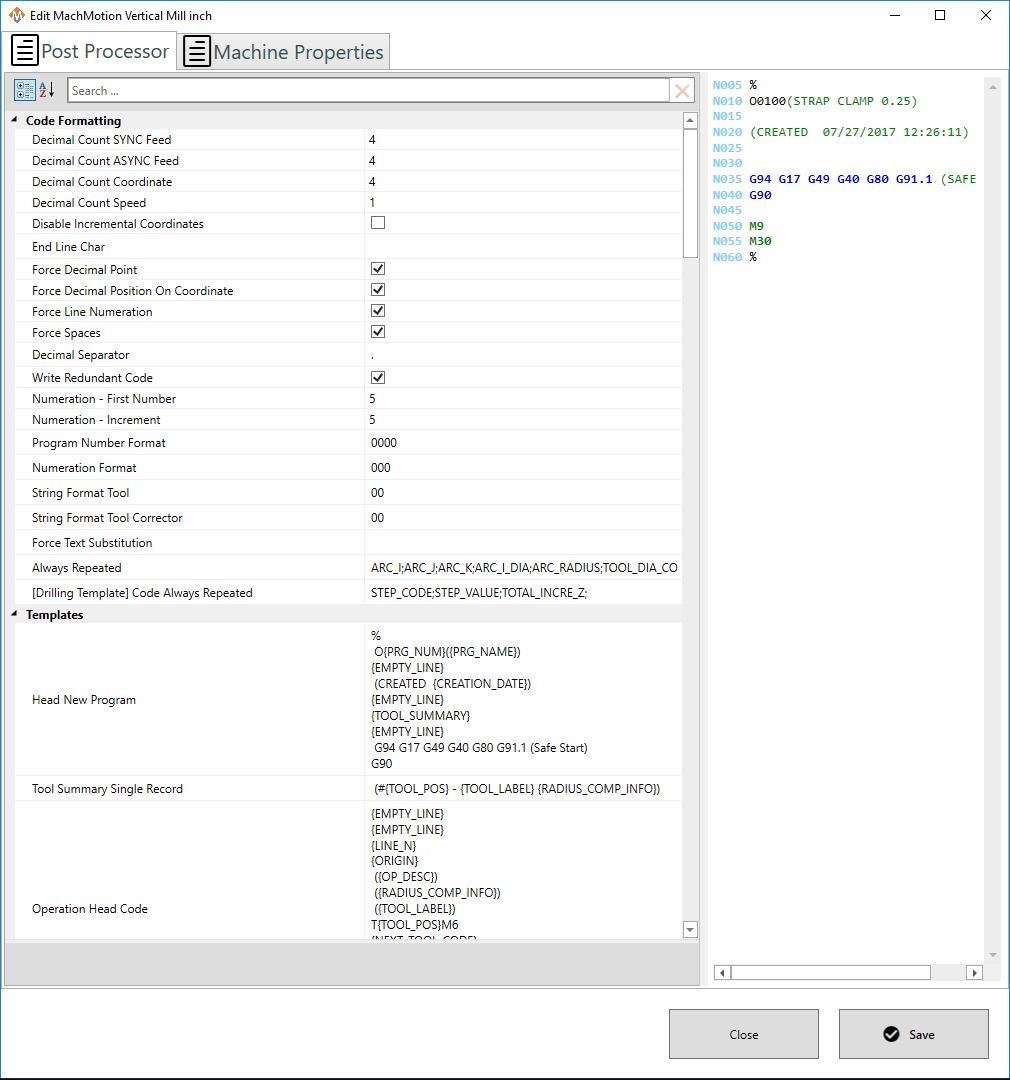
Origin Mode allows you to indicate the parts zero position, lets choose “Single Origin” and name our setup so we can load this profile later and set it to our default values. I’ve put “MachMotion Mill” as my Setup description. Let’s name our program name, this will be the name of the operation we will be performing, in this case we are cutting out a fixture mount strap clamp using a quarter inch end mill so let’s call it “Strap Clamp 0.25”. Safe Z is the height the Z axis will go to when making rapid movements. Depending on your machine this might be different, let’s put in “1” inch.
Editing Vertical Mill
Towards the bottom of the “INIT NEW SETUP” there is a “Edit Tool Machine” this allows us to further tailor our setting to meet our machines specifications. Click on the “Edit Tool Machine” and in this menu you have the options to change everything from “Measurement Units” to “Inverting Z Axis”, in an upcoming video we will go over in detail the options here. Let’s hit the “Ok” button to close out that window and also click the “Ok” green button to save your setting and move on to the stock definition setup.
Stock Definition
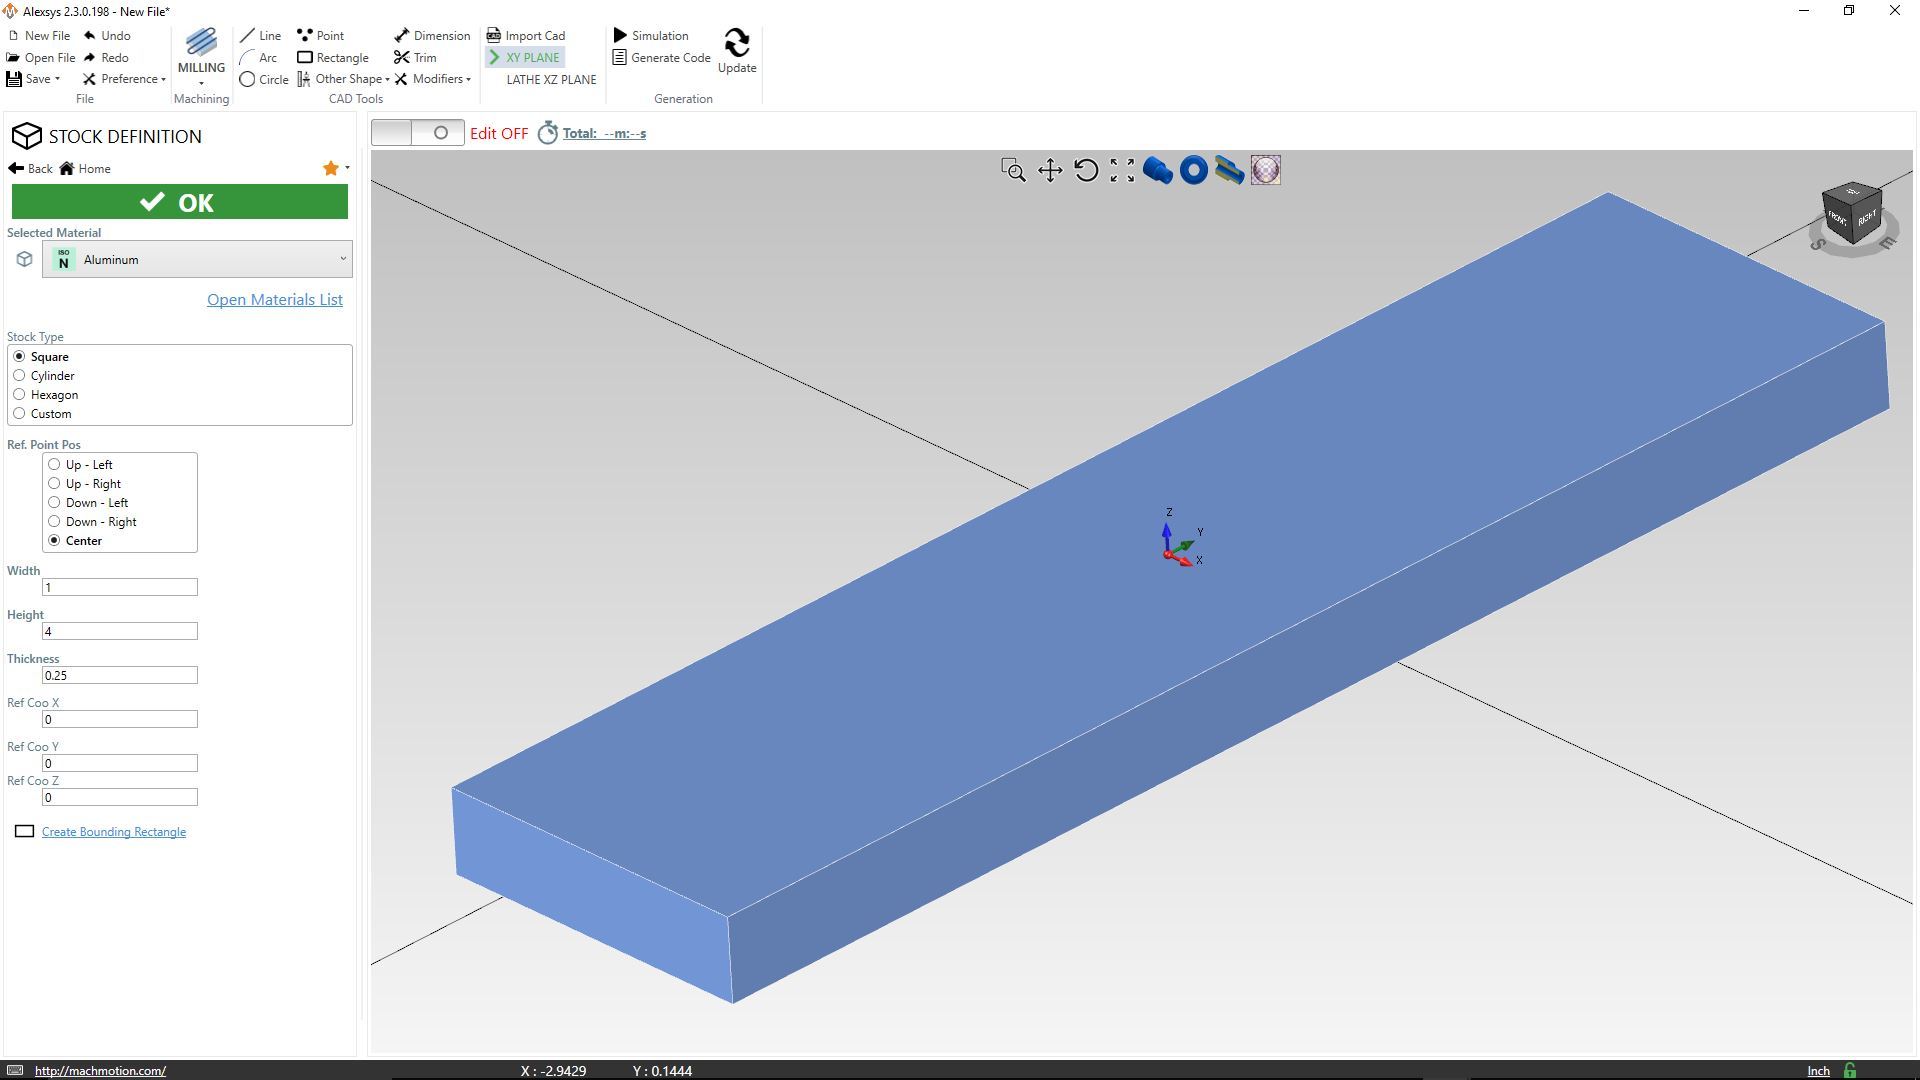
The Stock Definition setting allow us to setup our dimensions for the material we will be cutting. Let’s choose “Aluminum”, “Stock Type” as a “Square” and our “Ref. Point Pos” as “Center”. I prefer center as I commonly us a slightly larger stock and with a sharpie and ruler draw line to indicate center and eye ball the machine into position to set my relative zero.
We will be cutting out a 1 inch by 4 inch strap clamp so we will need our stock to be 1 x 4 x 0.25 and click the big green button ”OK”.
3D Preview Zoom Pan Rotate
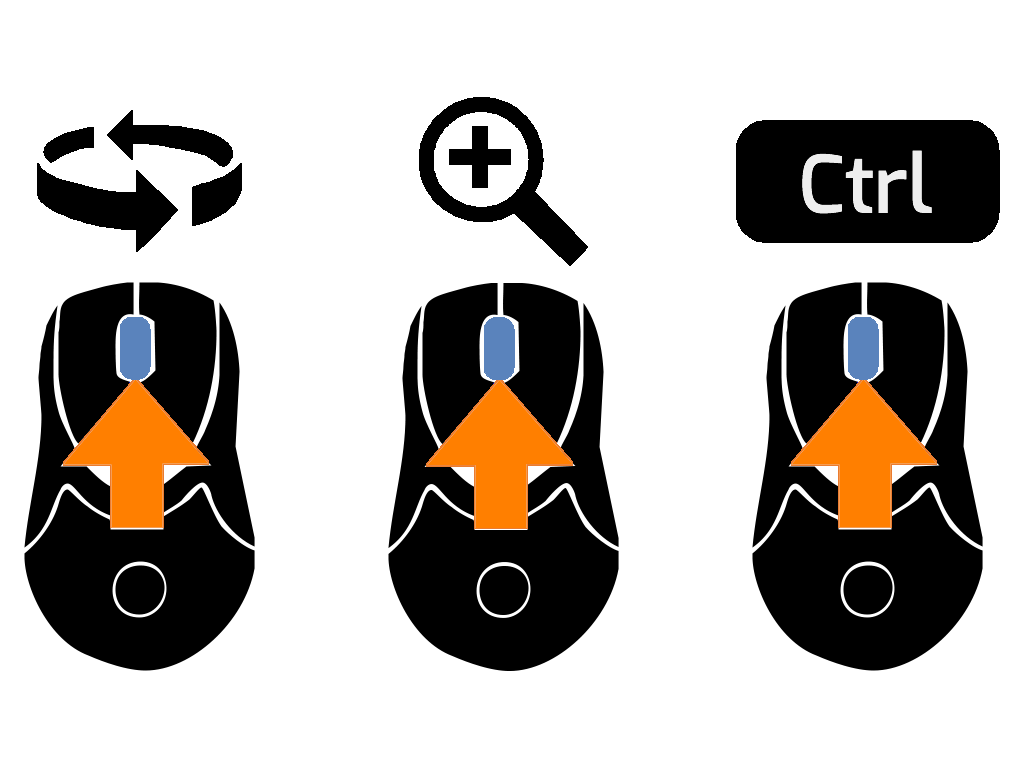
- To rotate press in the middle mouse wheel in the 3D preview window.
- To zoom roll the middle mouse wheel in the 3D preview window.
- To pan hold down the control key and press in the middle mouse wheel in the 3D preview window.
Pocketing
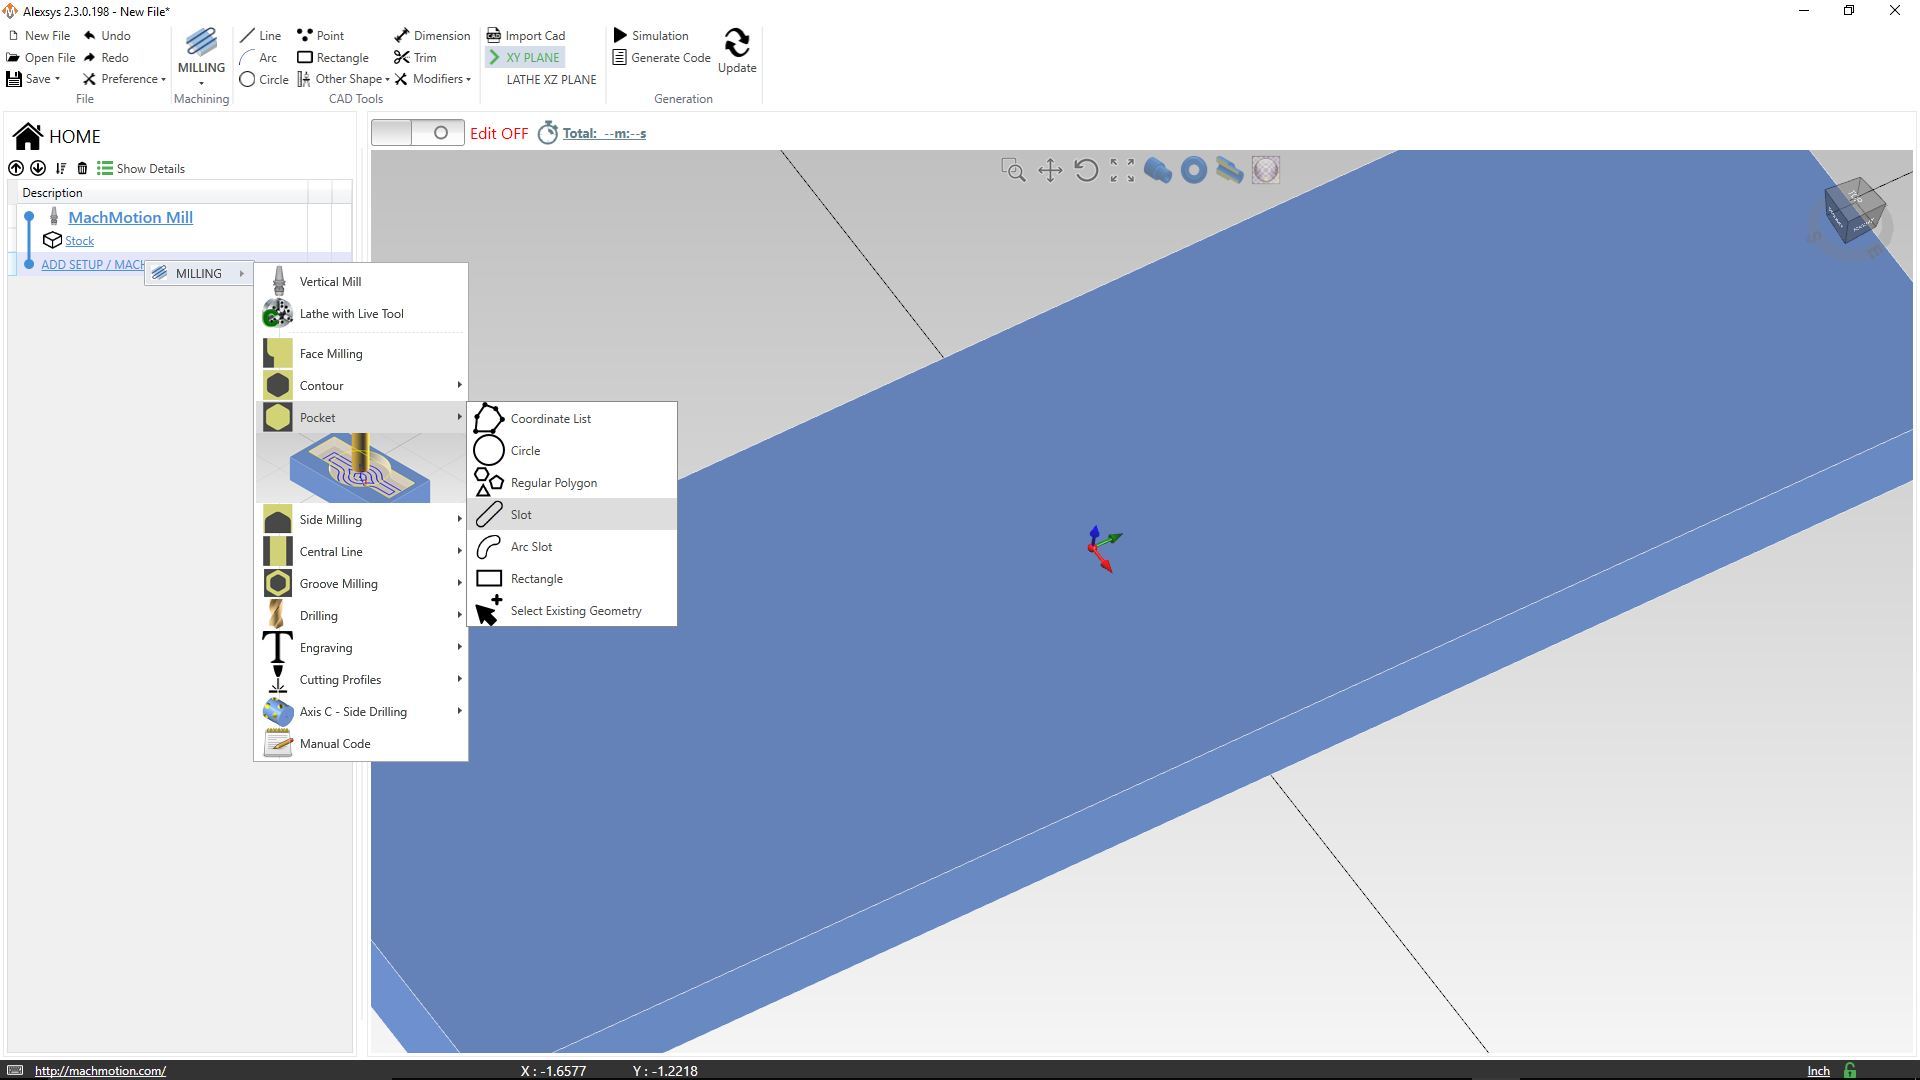
Let’s create our slot for our clamp. Click on the “ADD SETUP/MACHING”, “MILLING”, “Pocket” and then “Slot”. You will notice an image briefly describing each function to help you choose the correct routine.
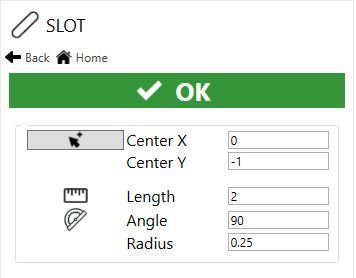
The Slot
It’s possible to draw out the location and distance of the slot but we know exactly what we want so let’s type in the values. We want the slot to be 2 x 0.5 x 0.25, in order to do this we will want to move our center Y -1 inch, set our Length to 2inch, Angle to 90 degrees and our Radius to 0.25. If you notice we are dividing everything in half to align things to our center origin. Let’s click the green ok button.
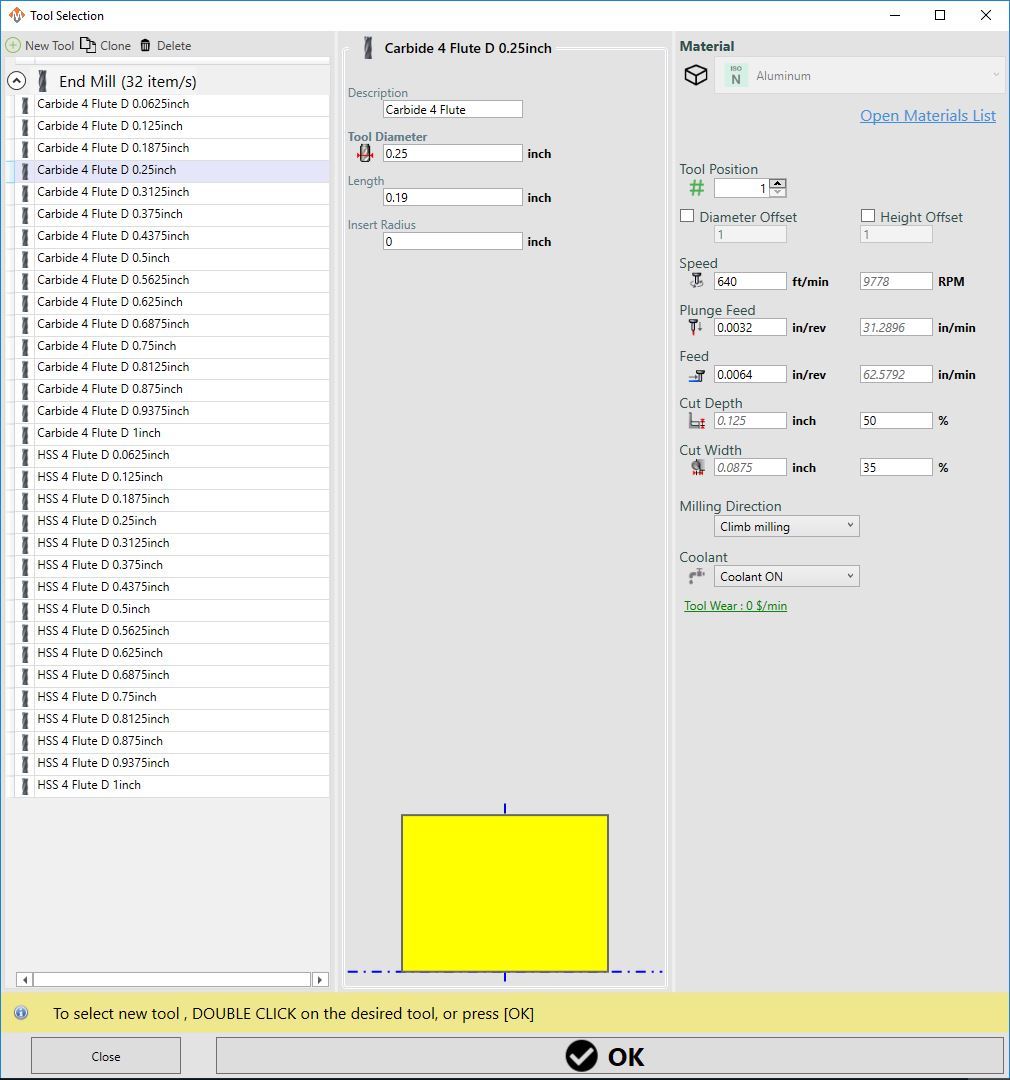
Choosing a Tool
Now that we have our slot created lets choose the right tool. In Alexsys you can easily setup multiple machining jobs such as Roughing, drilling, finishing and much more. Let’s choose “Roughing” as we only need a slot for our mount screw to go. Click the “Roughing” text to choose a tool. In this new window you have all of your tools and their settings. Let’s choose “Carbide 4 flute D 0.25 inch” as our tool as this will match our slot and give the quickest cut.
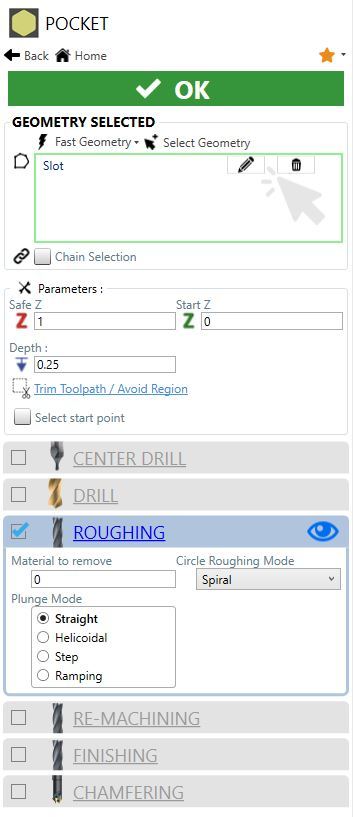
Double Check
Let’s check all of our settings, Safe Z is 1 inch, Depth is 0.25 and our tool path looks good! Now it’s time to Simulate our toolpath to make sure everything runs smooth and doesn’t collide.
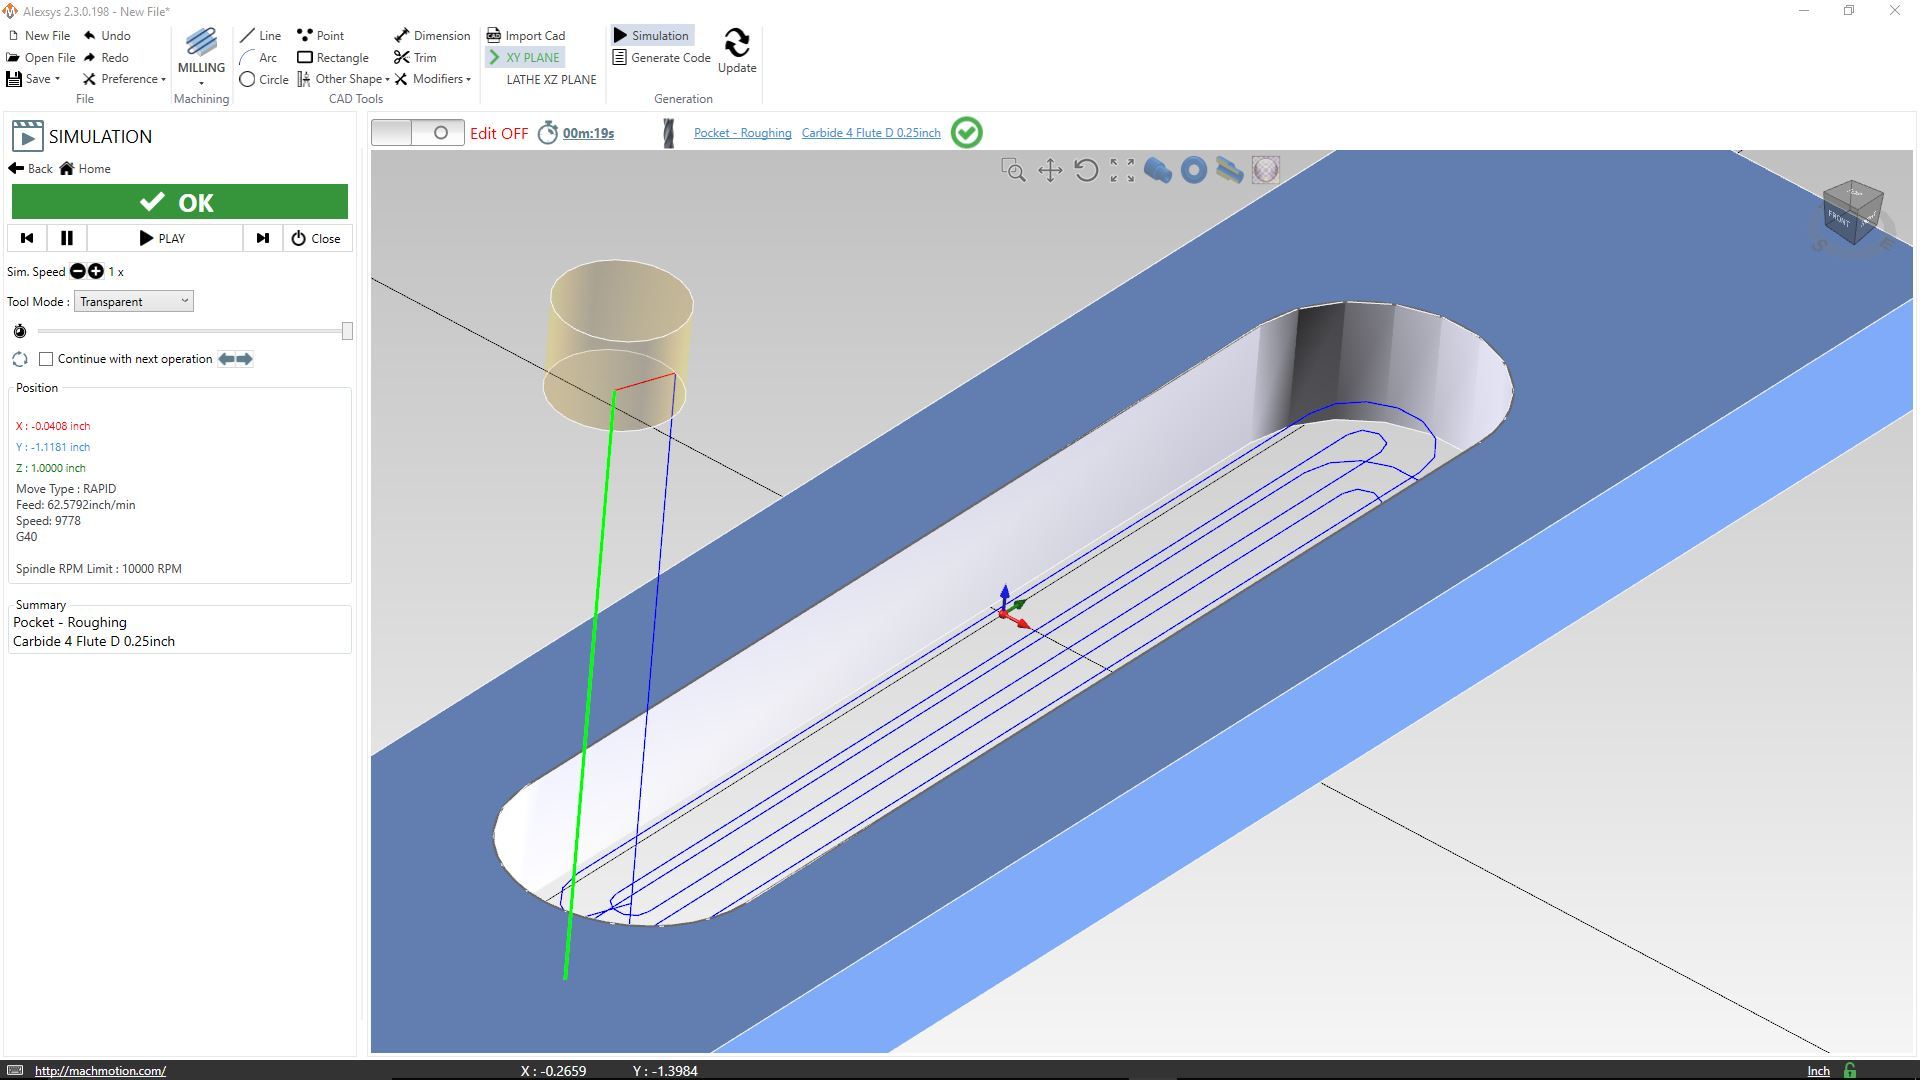
Simulation
Let’s Simulate our toolpath! In the top menu click “Simulation”. Automatically the simulation will start, to speed up or modify there is a list of controls on the left hand side. You can skip to anytime in the simulation and increase the speed. It looks like this will take 19s at 62 inch per minute, this is indicated at the top of the 3d toolpath viewer and along the left-hand panel.
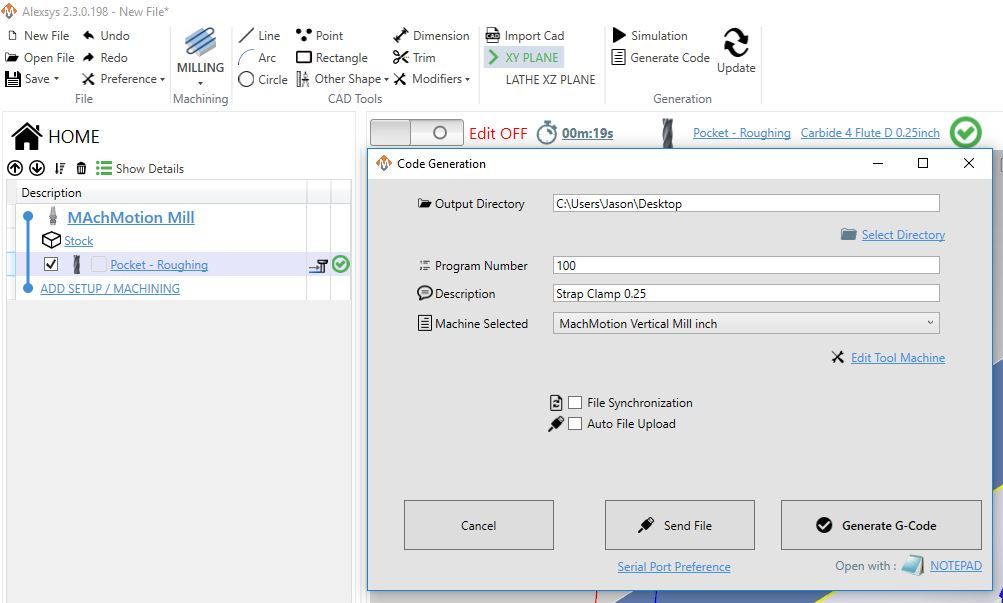
Generate Code to MachMotion Controller
Let’s click on the “Generate Code” in the top middle menu. We have a few ways to send this Gcode to the MachMotion controller. One is to click the Generate Gcode and save it to a location and then load it into MachMotion control software. The other is to directly send it using the “Send File”.
Run the Part
Now that we have Gcode file let’s start up our control software and load it in and make our clamps! First click on the upper left menu “File”. Now choose “Open Gcode” and find the previously generated file, it will have a “.NC” extension. Verify clearance and set up your aluminum block.